Category: Home Maintenance

  • Bathroom Renovation Cost in Central Florida

    Bathroom Renovation Cost in Central Florida

    A bathroom can look like a modest project until the walls come open. Behind a dated vanity or worn tile may be aging supply lines, moisture damage, outdated wiring, or a layout that no longer serves your family. That is why bathroom renovation cost is not one fixed number. It is the result of the room’s condition, the design choices you make, and the level of professional coordination required to complete the work properly.

    For Central Florida homeowners, a well-planned bathroom renovation is an investment in daily comfort, property value, and long-term durability. The best budget is not simply the lowest estimate. It is a clear plan that accounts for materials, skilled labor, permits when required, and the details that prevent expensive repairs later.

    What Does a Bathroom Renovation Cost?

    A bathroom remodel can range widely depending on its scope. A smaller hall bathroom refresh that keeps the existing layout may start in the low five figures. A primary bathroom renovation with a custom shower, upgraded plumbing fixtures, tile work, lighting, cabinetry, and layout changes can reach $30,000 to $60,000 or more.

    Those ranges are not a promise or a substitute for an on-site estimate. They are a practical starting point for understanding how project decisions affect the budget. Two bathrooms with the same square footage can have very different costs if one requires plumbing relocation, extensive waterproofing, structural repairs, or premium finishes.

    A dependable contractor should walk you through what is included before work begins. That means defining the scope, identifying likely allowances for selections, explaining permit needs, and setting expectations for project sequencing. Clear communication at this stage protects both the budget and the schedule.

    The Biggest Factors Behind Bathroom Renovation Cost

    Scope: refresh, remodel, or full reconstruction

    The first question is how much of the existing bathroom stays. Repainting, replacing a vanity, updating fixtures, and installing new flooring is a refresh. It can improve the room without disturbing plumbing or major wall surfaces.

    A full remodel generally includes demolition, new tile, a shower or tub update, vanity and countertop replacement, lighting, paint, and fixture installation. Reconstruction goes further, often involving layout changes, moving plumbing, opening walls, correcting damage, or enlarging the bathroom. The deeper the work goes, the more labor, inspections, and contingency planning are needed.

    Keeping the toilet, shower, and vanity in their existing locations is often one of the most effective ways to control costs. Moving them can be worthwhile when the layout is truly limiting the room, but it should be a deliberate design decision rather than an afterthought.

    Materials and finish selections

    Material choices create some of the most visible differences in a finished bathroom. A stock vanity, standard porcelain tile, and readily available plumbing fixtures can deliver a durable, attractive result. Custom cabinetry, natural stone, specialty tile patterns, frameless glass, and high-end fixtures raise both material and installation costs.

    The key is to spend where performance matters most. In a wet area, waterproofing systems, properly installed tile, reliable valves, ventilation, and quality plumbing connections deserve priority. A less expensive decorative choice can be changed later. A failed shower pan or poorly managed moisture issue cannot.

    Tile is a good example of the trade-off. Larger-format tile may create a clean, modern appearance, but it can require more surface preparation and careful cutting. Small mosaic tile may cost less per piece in some cases, yet its installation can be labor-intensive because of the additional layout and grout work.

    Labor, trades, and project management

    A bathroom is a compact space with several skilled trades working in sequence. Demolition must happen before rough plumbing and electrical work. Walls may need repair before waterproofing. Tile must be complete before final fixtures, glass, and finishing touches can be installed.

    The labor portion of an estimate reflects more than installation hours. It includes coordination, jobsite protection, debris removal, inspections, scheduling, quality checks, and the responsibility of ensuring each part of the work supports the next. Fragmented subcontractor management may appear less expensive at first, but missed handoffs and unclear accountability can create delays and rework.

    Plumbing, electrical, and ventilation upgrades

    Older homes in Mount Dora, Orlando, Sanford, and surrounding communities can reveal conditions that are not obvious during initial design. A contractor may find corroded pipes, ungrounded wiring, inadequate exhaust ventilation, or previous work that does not meet current requirements.

    These upgrades affect the initial bathroom renovation cost, but they also protect the home. Proper ventilation helps manage humidity. Updated electrical work supports lighting, exhaust fans, and safety devices. Sound plumbing work reduces the risk of leaks behind finished walls and beneath new flooring.

    Permits and local requirements

    Permit needs depend on the project scope and the local jurisdiction. Cosmetic changes may not require the same approvals as plumbing relocation, electrical work, structural modifications, or major alterations. When permits are needed, they should be treated as part of responsible project planning, not an optional extra.

    Permitting can add fees and time to a renovation, but it also provides a documented process for work that affects key building systems. A licensed, bonded, and insured contractor can help identify the appropriate path before the schedule is set.

    Budgeting for the Unknown Without Losing Control

    No homeowner wants surprise costs, but a realistic renovation budget should include a contingency for conditions that cannot be confirmed until demolition. In many projects, setting aside roughly 10% to 15% of the construction budget is sensible, particularly in older homes or bathrooms with known moisture concerns.

    That contingency is not a blank check. It is a planning tool. If a problem is uncovered, the contractor should explain what was found, why it matters, what the repair options are, and how each option affects cost and timing before proceeding.

    Four conditions commonly create change orders in bathroom work:

    • Water damage or mold behind tile, flooring, or walls
    • Plumbing lines that need replacement or relocation
    • Electrical updates required for safe, code-compliant work
    • Uneven framing or subfloors that must be corrected before tile installation

    A detailed estimate cannot eliminate every unknown, but it can make the process far more predictable. Look for clear scope descriptions, material allowances, exclusions, payment milestones, and a process for approving changes in writing.

    Where to Spend and Where to Save

    A successful renovation does not require choosing the most expensive option in every category. It requires matching your budget to the parts of the room that affect everyday use and long-term performance.

    Spend thoughtfully on the shower system, waterproofing, ventilation, plumbing valves, durable flooring, and professional installation. These are difficult and costly to correct after the room is finished. It is also worth investing in storage that supports your routine, whether that means a larger vanity, recessed medicine cabinet, or linen storage.

    Savings are often possible with well-selected stock cabinetry, standard fixture finishes, porcelain rather than natural stone, and keeping the existing layout. Choosing materials that are available locally can also reduce lead-time risk. The right selection is not the one that photographs best in isolation. It is the one that performs well, fits the design, and supports the project schedule.

    Questions to Ask Before You Approve an Estimate

    Before signing a contract, ask what the price includes from demolition through final cleanup. Confirm who is responsible for permits, inspections, material ordering, debris removal, and coordination of each trade. Ask how concealed damage will be documented and approved if it is found.

    You should also understand the proposed timeline. Material availability, custom glass fabrication, permit review, and the size of the renovation can all affect duration. A contractor who offers regular updates is better positioned to address decisions quickly and keep the project moving.

    For homeowners who want one accountable point of contact, DA Construction coordinates the skilled labor, materials, and project oversight needed to carry a bathroom renovation from planning to completion, backed by a one-year workmanship warranty.

    Plan the Room Before You Fall in Love With the Finish

    The easiest way to keep a bathroom renovation on budget is to establish the scope before choosing every finish. Decide what the room needs to do better: improve storage, create a safer shower entry, add better lighting, replace failing surfaces, or make a primary bath more comfortable for the years ahead.

    Then build selections around that purpose and leave room in the budget for the work behind the walls. A bathroom that is properly planned, clearly priced, and carefully built will keep paying you back long after the new tile has become familiar.


  • Hello World 2

    Hello World 2

    Welcome to Elementor 2

  • Hello World 3

    Hello World 3

    Welcome to Elementor 3

  • Hello World 1

    Hello World 1

    Welcome to Elementor

  • Garage Addition: Expand Your Home’s Potential

    Garage Addition: Expand Your Home’s Potential

    Garage Addition: Expand Your Home's Potential

    Unlocking Hidden Potential: Why Homeowners Are Turning to Garage Additions

    More homeowners than ever are reimagining their properties by adding garages—not just for cars, but for long-term value and versatility. With space at a premium in cities like Mount Dora and throughout Central Florida, a garage addition offers a smart, scalable solution to growing storage, parking, and functional space needs. Whether you’re lacking room for vehicles, tools, or even future home gym plans, expanding your garage can address multiple pain points at once.

    This guide walks you through the core benefits, design considerations, and practical steps involved in planning a garage addition that aligns with your lifestyle and local building standards. You’ll learn how to assess your property’s potential, choose the right layout and materials, and navigate permitting—all while maximizing return on investment. From deciding between attached or detached structures to understanding foundation types and insulation requirements, we’ll break down the essentials in clear, actionable terms.

    Discover how a well-designed garage addition can enhance curb appeal, support your daily routines, and adapt to future needs—without the cost and complexity of a full home renovation.

    Unlock Hidden Value: Why a Garage Addition Pays Off in Storage, Space, and Savings

    Adding a garage isn’t just about parking cars—it’s a strategic home upgrade that delivers measurable benefits in functionality and long-term value. For homeowners in Central Florida seeking smarter ways to organize, create, and invest, a well-designed garage addition can solve multiple pain points at once.

    First, reclaim indoor space by moving seasonal gear, tools, and lawn equipment out of closets and basements. With dedicated overhead racks, wall-mounted systems, and durable cabinetry, even compact garages in Mount Dora or nearby communities can maximize storage capacity. This is especially valuable in areas with active outdoor lifestyles and frequent home maintenance needs.

    Beyond storage, today’s garages double as versatile workspaces. Whether you’re into woodworking, automotive projects, or DIY crafts, a climate-controlled, well-lit garage workshop boosts productivity and protects equipment. Installing energy-efficient insulation and proper ventilation ensures comfort year-round, even during Florida’s humid summers.

    Perhaps most importantly, a finished garage addition typically offers strong return on investment. Homes with updated, usable garage spaces often see increased appraised values and attract buyers faster in competitive markets like Lake County. When planned with quality materials and code compliance, your addition doesn’t just serve daily needs—it strengthens your home’s overall marketability.

    Planning Your Garage Addition: What You Need to Know Before Breaking Ground

    Adding a garage to your home is more than just creating extra parking space—it’s a strategic home improvement that boosts functionality and value. Before construction begins, careful planning around size, location, and compliance is critical to a smooth process and a successful outcome.

    Start by determining the right size based on your needs: a one-car garage typically measures 12×20 feet, while a two-car setup usually ranges from 20×20 to 24×24 feet. Consider future use—will you need room for tools, storage, or workshop space? Next, evaluate placement. Attach the garage to your home for convenience or go detached to preserve your home’s aesthetics. Pay close attention to setbacks—the required distance from property lines—as zoning laws in cities like Mount Dora and surrounding Central Florida areas often dictate where structures can be placed.

    Equally important is compliance with local building codes. These regulations cover structural integrity, electrical wiring, insulation, and fire safety. Permits are typically required, and inspections will be scheduled at key stages. Skipping this step risks fines or failed inspections. By addressing size, location, and code requirements early, you ensure your garage addition adds long-term value without costly setbacks.

    From Blueprint to Build: Your Step-by-Step Guide to a Successful Garage Addition

    Transforming your home with a garage addition starts with a clear, actionable plan. Follow this proven sequence to ensure a smooth project from concept to completion.

    1. Assess Needs & Local Regulations
      Determine the size, layout, and purpose of your garage—storage, workshop, or extra parking. In Mount Dora and similar Florida communities, check zoning laws, setback requirements, and homeowners’ association rules early to avoid redesigns later.

    2. Design with Function in Mind
      Work with a designer to draft plans that align with your home’s architecture. Include essential features like ceiling height for storage, proper ventilation, and energy-efficient windows or insulation suited for the Central Florida climate.

    3. Secure Permits
      Submit plans to your local building department. Most jurisdictions require permits for structural changes, electrical, and plumbing work. Allow 2–4 weeks for approval to keep your timeline on track.

    4. Excavate & Pour Foundation
      Clear the site and grade for drainage. A reinforced concrete slab or pier foundation should be poured by professionals to prevent cracking due to soil shifts common in Florida.

    5. Frame, Enclose, and Weatherproof
      Erect walls and roof trusses, then apply sheathing, housewrap, and roofing. This phase protects the structure from rain and humidity—critical in the Mount Dora area’s wet seasons.

    6. Complete Interior & Finishing Touches
      Install doors, lighting, insulation, and flooring. Consider epoxy coatings for durability or built-in cabinets for functionality.

    Stay organized, plan for weather delays, and inspect each phase to ensure your garage addition adds lasting value.

    What You Need to Know About Garage Addition Projects

    How much does a garage addition typically cost?

    Garage addition costs vary widely based on size, design, materials, and local labor rates. On average, homeowners can expect to invest between $20,000 and $40,000 for a standard two-car garage. Custom finishes, higher-end materials like stone veneers or insulated doors, and additional features such as storage lofts or interior drywall can increase the final price. In markets like Mount Dora and surrounding Central Florida areas, pricing may reflect regional building demands and permitting fees. Including site prep and utility connections (electrical, HVAC) in early planning helps avoid unexpected expenses.

    Do I need a permit for a garage addition?

    Yes, most municipalities require building permits for garage additions to ensure compliance with local zoning laws, setback requirements, and structural safety codes. Your contractor should handle permit applications, but it’s essential to verify that all paperwork is filed and approved before breaking ground. Skipping permits can delay inspections, affect insurance coverage, and complicate future home sales.

    How long does a garage addition take to complete?

    Most garage additions take 6 to 12 weeks from permit approval to final inspection. Factors influencing the timeline include weather, material availability, and design complexity.

    Can I use the space for purposes other than parking?

    Absolutely—many homeowners design garage additions to double as workshops, storage rooms, or even accessory living units (ADUs), subject to local zoning rules.

    Will a garage addition increase my property value?

    In most cases, yes—especially in regions where parking and storage are at a premium. A well-constructed garage can boost resale appeal and functional utility.

    What site considerations should I evaluate?

    Check lot size, drainage patterns, utility lines, and easements. A professional site assessment ensures your design fits within property boundaries and avoids costly surprises.

    Should I hire an architect or designer?

    For custom or structural additions, involving a designer ensures code compliance, optimal space use, and visual harmony with your home’s existing style.

    Future-Proof Your Home with a Smart Garage Addition

    A garage addition isn’t just about extra parking—it’s a strategic home improvement that delivers lasting value, functionality, and flexibility. From increased storage and workspace to potential rental income or a future home gym, the long-term benefits extend well beyond the initial investment. In Florida’s evolving housing market, where space utilization is key, expanding your garage can significantly enhance your property’s appeal to buyers while improving your daily lifestyle.

    Homeowners in Mount Dora and surrounding Central Florida areas are finding that a well-designed garage addition supports multiple needs: protecting vehicles from intense sun and humidity, housing lawn equipment, or creating a secure workshop for tools and projects. Over time, this added space pays for itself through improved organization, reduced maintenance costs, and greater energy efficiency when insulation and sealing are properly installed.

    To move forward:

    • Assess your current and future space needs
    • Research local zoning rules and permitting requirements in your city
    • Work with licensed contractors who understand Florida’s building codes

    Start planning your garage addition today—whether for resale value or personal convenience, it’s a smart step toward maximizing your home’s true potential.

  • What Does a Workmanship Warranty Cover at Home?

    What Does a Workmanship Warranty Cover at Home?

    A new kitchen, bathroom, addition, or garage should feel finished when the crew leaves. But a concern may not show up until later: a cabinet door begins to sag, a shower tile cracks along a grout line, or newly installed drywall develops an unusual seam. That is when homeowners ask, what does a workmanship warranty cover? The answer is generally the contractor’s labor and installation quality, not every problem that could occur in or around the completed project.

    A workmanship warranty is a clear form of accountability. It gives you a defined period to report defects caused by the way work was performed, so the contractor can assess the issue and make an appropriate repair. The exact coverage depends on the written agreement, the type of project, and the condition causing the problem.

    What Does a Workmanship Warranty Cover?

    A workmanship warranty typically covers defects that result from improper installation, poor construction practices, or failure to complete the contracted work to an acceptable professional standard. In plain terms, it applies when the labor itself caused the issue.

    For a remodeling project, covered concerns may include tile that was installed unevenly and later loosens, trim that separates because it was not properly secured, or a door that does not operate correctly because it was hung out of alignment. If drywall seams were improperly finished and fail under normal conditions, that may also fall under workmanship coverage.

    The key phrase is under normal conditions. A warranty is intended to stand behind the quality of completed labor. It is not a promise that a home will never settle, a product will never fail, or an accident will never damage the work.

    A one-year workmanship warranty, such as the coverage DA Construction provides on completed work, gives homeowners time to live with the finished space through changing temperatures, normal daily use, and seasonal humidity. That window can reveal concerns that were not apparent at final walkthrough, while also setting a practical and documented timeframe for resolution.

    Examples in kitchens and bathrooms

    In a kitchen, workmanship coverage may apply if cabinets were improperly anchored, an installed countertop support was not built as specified, or a backsplash develops an issue tied to installation. In a bathroom, it could address a fixture that was incorrectly installed, a shower enclosure problem caused by faulty fitting, or tile work that fails because of an installation error.

    However, each situation needs an inspection. A loose tile caused by an inadequate installation is different from a tile chipped when a heavy object was dropped on it. The visible symptom may look similar, but the cause determines whether the workmanship warranty applies.

    Examples in additions, garages, and repairs

    For additions and garage projects, the warranty may cover labor-related issues such as improperly fitted interior doors, trim separation caused by inadequate fastening, or drywall finish problems tied to the original work. For smaller repairs, it may cover the specific repair area if the repair fails because it was not performed correctly.

    Coverage should match the scope of the contract. If a contractor repairs one section of drywall, the workmanship warranty normally applies to that repair, not to unrelated cracks elsewhere in the house. This is one reason a detailed scope of work protects both the homeowner and the contractor.

    What a Workmanship Warranty Usually Does Not Cover

    A workmanship warranty is valuable, but it has limits. Knowing those limits before a project begins helps prevent frustration later.

    It usually does not cover damage caused by misuse, lack of maintenance, accidents, pets, tenant damage, or unauthorized alterations. If a homeowner removes a cabinet, installs new hardware incorrectly, or hires another party to modify the completed work, the original contractor may not be responsible for resulting problems.

    It also commonly excludes normal wear. Paint scuffs, worn caulk in heavily used wet areas, minor settling movement, and gradual aging are part of homeownership. Central Florida’s heat, humidity, storms, and shifting moisture conditions can affect homes over time. Some movement may be normal, while other movement may point to a construction issue. A professional review is the best way to tell the difference.

    Material defects are another important distinction. If a manufactured faucet leaks because an internal component fails, the product manufacturer’s warranty may apply rather than the contractor’s workmanship warranty. If the leak stems from an improperly connected supply line, the labor warranty may be relevant. Quality contractors help clients understand which party should address the issue instead of leaving them to sort it out alone.

    A workmanship warranty also may not cover pre-existing conditions that were outside the project scope. Hidden water damage, structural concerns behind existing walls, aging plumbing, or electrical problems can become visible during a renovation. A contractor should communicate these discoveries promptly, explain the available options, and document any approved change in scope.

    Why the Written Warranty Matters

    Do not rely on a verbal assurance that a contractor will “take care of it.” A written workmanship warranty should identify the warranty period, describe what work is covered, explain exclusions, and state how to request service. It should also clarify whether the contractor will repair, replace, or otherwise correct a verified workmanship defect.

    Before signing a construction agreement, ask direct questions. How long is the workmanship coverage? Does it apply to labor only or to labor and specified materials? Are manufacturer warranties provided separately? What maintenance is expected after completion? Who should you contact if a concern appears?

    You do not need a legal background to ask for clear answers. A dependable contractor welcomes these questions because clarity at the start makes the project easier to manage and supports a better client relationship after completion.

    How to Use a Workmanship Warranty If a Problem Appears

    Start by documenting the concern as soon as you notice it. Take clear photos or video, note when the issue first appeared, and save your contract, final invoice, product information, and prior project communications. This creates a useful record without assuming the cause.

    Then contact the contractor promptly and describe the issue plainly. Avoid making repairs yourself before the contractor has an opportunity to inspect it, except when immediate action is needed to prevent injury or further property damage. For example, an active water leak may require quick mitigation. In that situation, document the condition and notify the contractor as soon as possible.

    A responsible contractor should review the concern, determine whether it is connected to the completed scope, and explain the next step. Sometimes the fix is straightforward. Other times, the issue requires troubleshooting because the cause involves a product, an existing condition, another trade, or normal movement in the home.

    Good communication matters here as much as it does during construction. Homeowners deserve a timely response and a practical explanation, even when the issue is not covered by the workmanship warranty. Clear findings allow everyone to decide how to proceed without guesswork.

    Protecting Your Home After the Project

    A warranty works best alongside routine care. Follow product care instructions, keep wet areas properly ventilated, address plumbing leaks quickly, and avoid harsh cleaners on surfaces that do not support them. Keep drainage away from the home’s foundation and inspect caulk, grout, weatherstripping, and exterior sealants as part of regular maintenance.

    At final walkthrough, ask the contractor to point out the care needs specific to your project. A remodeled shower requires different upkeep than a new garage, and a kitchen with natural stone needs different care than one with quartz. These conversations help preserve the materials and make it easier to identify a genuine workmanship concern early.

    Choosing a Contractor Who Stands Behind the Work

    The warranty itself matters, but the company behind it matters just as much. Look for a licensed, bonded, and insured contractor with a clear scope, trained workers, documented communication, and a process for addressing post-project concerns. A low initial estimate is not much of a bargain if it comes with vague responsibilities or no reliable path to resolve a problem.

    For Central Florida homeowners, the strongest protection begins before construction starts: choose a contractor who explains the work, keeps you informed, uses quality materials, and puts its workmanship commitment in writing. When questions arise after the last detail is complete, you should know exactly who to call and what happens next.

  • Property Maintenance Tips – Exterior

    Property Maintenance Tips – Exterior

    Owning a residential property comes with many joys, but with great power comes great responsibility, said Spider-Man’s uncle, and this is true. Let me ask you, how many times have you driven past a home that looks like the jungle is swallowing it whole? Yeah, we’ve all seen that. Regular upkeep not only ensures the longevity of your property but also contributes to a comfortable and safe living environment. Not to mention, the value of your property and the neighborhood goes up when properties are taken care of.

    This is the first of multiple blogs where we will explore the essential aspects of residential property maintenance from the point of view of our project managers here at DA Construction, Inc. Our goal is to provide you with a comprehensive guide, giving you a good idea of what you can do to keep a happy home in this Central Florida weather.

    Let’s kick off this edition talking about exterior maintenance and curb appeal. Aside from bringing value to your home, taking care of the exterior is a great way to protect it from deterioration. Let’s leave the items that are straightforward out for a moment, like trimming your bushes, doing your lawn, and weed control. Let’s talk about items that are not so obvious, like windows, gutters, paint, and siding.

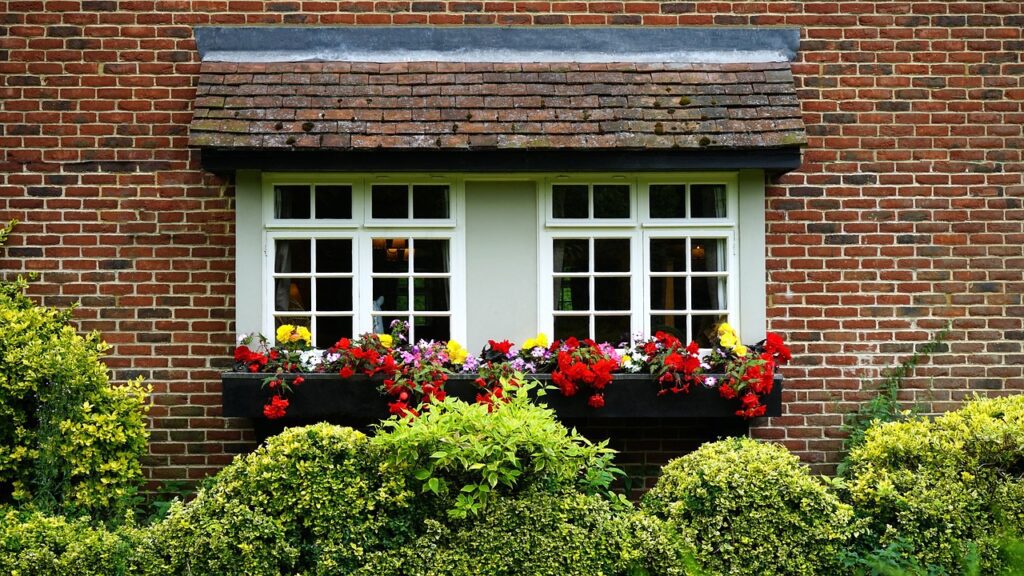
    house, window, home-1507920.jpg

    Story time! Bear with me… A couple of months after my husband and I bought our first home, we noticed a few cracks on the outside. Mind you, we were brand new to this homeownership thing, and we thought, “Our house is falling apart! What did we do?” So we called an inspector, which was the first thing we could think of. And that is where we learned about settling.

    Now, settling for those who are new to this like we were, is just what it sounds like. After a home is built, there is still movement in the earth, and weather is happening around it, especially here in Florida, so the home is constantly “settling” into place. It’s pretty common and typically happens slowly; however, some properties could have fast settling, and it can lead to eventually having foundation issues as a result of it. This was something my husband and I had heard of, and we were terrified.

    Cracks

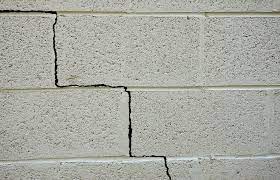
    The inspector said our home was fine and told us to simply paint over them. He also advised us to call a foundation expert if we ever saw the cracks exceeding half an inch and/or if the cracks became uneven (meaning one side of the crack was sticking out more than the other). Those would be signs of something greater happening in the foundation of our home. Furthermore, settling can also bring cracks to the ceiling of the property. Once again, this is normal and will happen to most properties over time.

    Fast forward a year, and I start working at a construction company, DA Construction, Inc. You might have heard of it… We get people calling in about their windows leaking, walls showing signs of moisture, or living room floors getting flooded after a storm. And once again, we live in Florida, where we get plenty of storms. So I ask Alan and David what can cause this, and the following is the information I received:

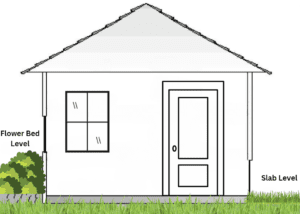
    • Flooding floors: Many individuals love to have beautiful flower beds in front of their homes, but they need to beware. If your flower bed goes above the inside floor level of your home, it can cause water to accumulate above the slab level. Over time, it will find a way to get into the home, and once it does, it can lead to flooding. In some cases, it is hard to detect the problem until mold starts to build up. That is the worst-case scenario.”
    Screenshot 2024 01 09 110312 300x214
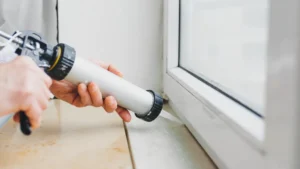
    • Windows Leaking: Over time, with the settling of a home, windows may shift and crack the caulk seal around them. If a homeowner does not regularly seal windows, this can cause water to find its way into the home, especially on those stormy Central Florida rainy days – AKA always.
    Worker Using Silicone Tube 300x169
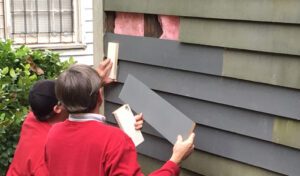
    • Damp Walls: Water will take any opportunity to get into your home. Making sure the siding of your home is in good shape and the water is being diverted downward is the best thing you can do to avoid intrusion. If you have a block home, make sure you not only paint the cracks, as the inspector told me, but also caulk them to seal and keep the water out.
    844 Five Common Exterior Home Repairs 3 Siding Repair 300x176
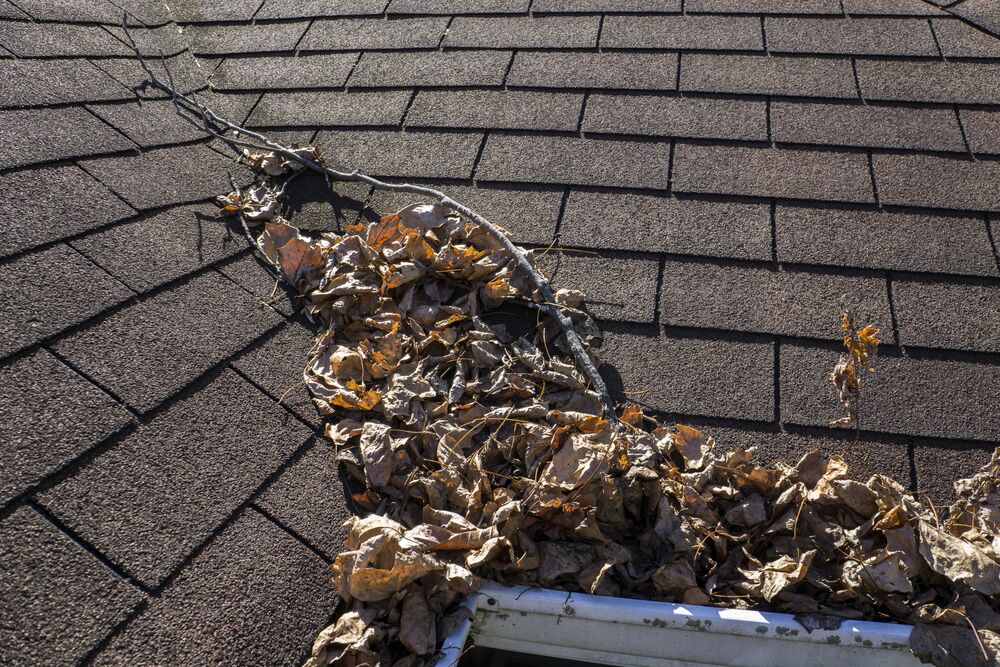
    • Bonus! Roof Leaks: A great way to avoid roof deterioration is to keep the leaves out of your roof. Like flower beds, they accumulate water, and this water wants to find a way into your home. Keep your gutters clean while you’re up there. Your roof will thank you, and your insurance will love it!
    D96ef3c00ae047e8a7b178b1314ea95c.shutterstock 320570288 1
    Let’s touch base on those homes that we all have seen getting swallowed by nature; it’s a crazy thought, but those homes were once BRAND NEW and presumably neglected by their homeowner. And it’s true, a new home doesn’t require a lot of maintenance. But blowing the leaves out of the gutters and roof every few months, caulking windows every few years, and patching any cracks the same day will show your home you care. The love will be returned to you in compliments, and hey, it might inspire your neighbor to keep their home in better shape. Either that, or your home will get lots of love from nature.”